
Let’s assume that we have some exposure to the Azure world. There are two parts to this blog: one where we need to create an Azure app for authenticating to SharePoint and a second one for Creating the Azure Functions. Let’s create the app first.
Azure App Registration: –
There is so many ways that we can authenticate to SharePoint Online, I am using azure app registration to authenticate to SharePoint Online and I am not going to go deep into azure app registration and it’s pro’s and con’s but I am going to walk you through how to create the app.
- Navigate to portal.azure.com
- All Services à Active Directory à Select App Registration from left side blade
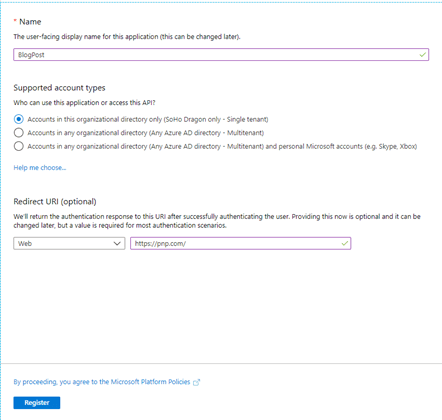
- Provide a Name of your app and some dummy Redirect URL, for this app I am using Current tenant account and single tenant option.
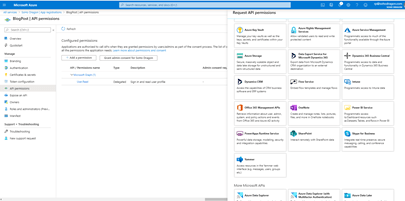
- Once the app created successfully, we need to Provide API Permissions for the app, Please click on the API Permissions link from the left Blade à Click Add a Permission Button à you will end up Request API permissions Blade with lot of options and please Select SharePoint from the Blade.
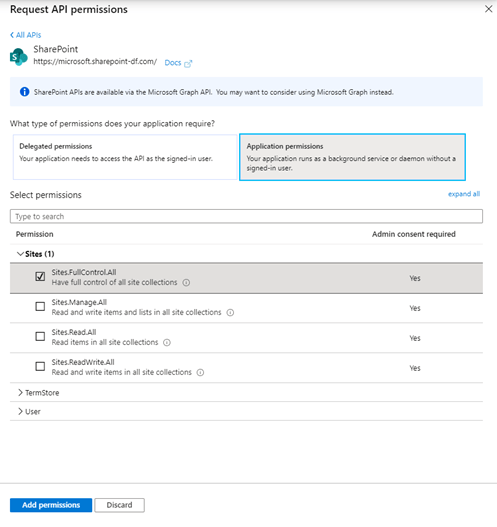
- For this project we need to provide Application Permissions for this app. Click on the Application Permissions and Select Full Control for all sites and Click Add Permissions.
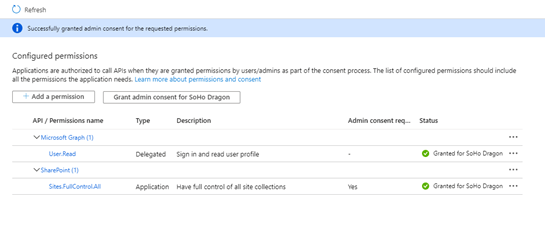
- Once we did that, we need to Grant Admin Consent for Soho Dragon.
- Now we need to create a Certificate for the authentication, please run this Code

- No Upload the certificate into the Portal by Clicking Upload Certificate.
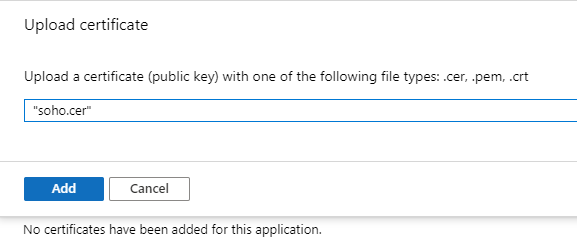
- Now we are going to use the App Client ID and Thumb Print to Authenticate to SharePoint.
Creating Azure functions: –
This will be the 2nd part of the app they we are going to create an azure functions, now I am using PowerShell to create the Azure functions please make a note that we can create Azure Functions using C# to but that is not for today.
- Navigate to portal.azure.com
- All Services à App Services à Click on Add button to create a new one or you can user the existing one.
- Once you are into the App service à Click Plus Icon from Functions on left blade
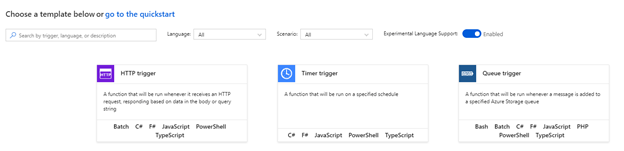
- Select the HTTP Trigger from the template if you are not able to see the PowerShell please select the radio button to enable Experimental Language Support, so that you will have more language support.
- Navigate to Azure functions Platform features à Advanced Tools (Kudu).
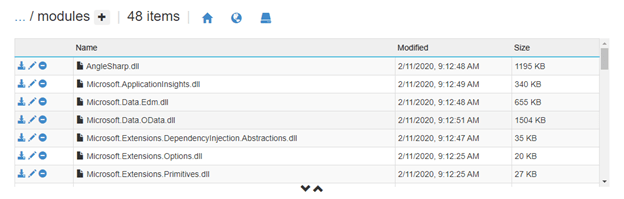
- Once Kudu Page opened, Click on Debug Console à Select PowerShell à site à wwwroot àHttpTriggerPowerShell1(your function app name) à modules
- Now we need to add all the PNP SharePoint Libraries to do that run below command in your local Machine
- Save-Module -Name SharePointPNPPoweshellOnline -Path “C:\PNP”
- Add all the libraries downloaded in the above folder as shown below.
- Now we need to define environment variables, navigate to function app and click on the Features à Configuration
-
Click on New application Settings and add following parameters
- ClientID à This one will be azure ad App client ID
- Thumbprint à This will be from the Certificate that we uploaded
- Tenant à In this case it’s my Tenant sohodragon.onmicrosoft.com (your tenant. onmicrosoft.com)
- ClientID à This one will be azure ad App client ID
- Once we are done with it lets write a test code to authenticate to SharePoint.
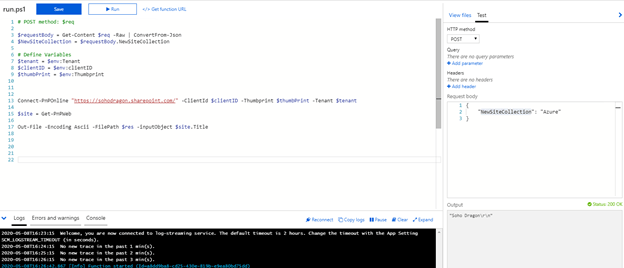
- 200 Ok and we are successfully authenticated to SPO and got the Title of the site now let’s write some code to create a new site collection and applying the other site template using pop PowerShell.
- Now this is the code that need to run in order to Create a site collection and apply the template to the new site collection using PNP Provisioning Engine.
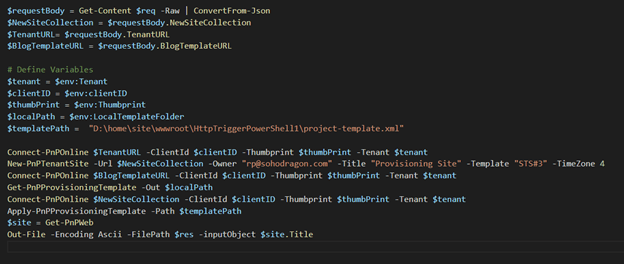
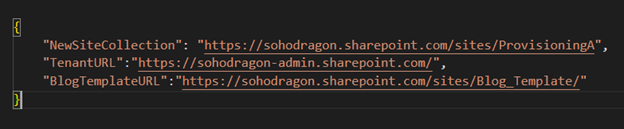
- Here is Parameters that I need to pass when calling the function.
-
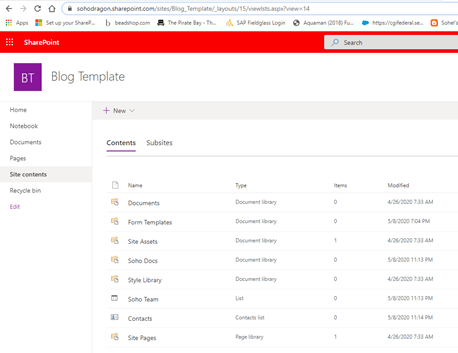
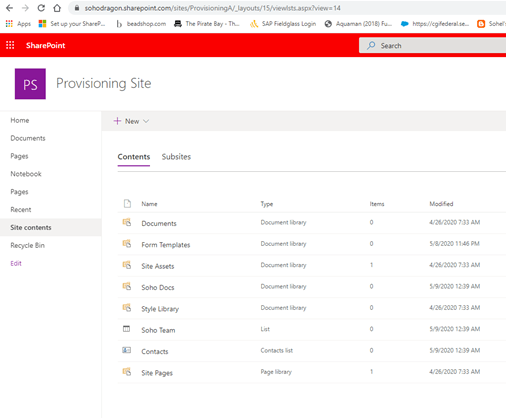
Adding few more Screen shots from the host and Provisioned site Collections.
Next blog post – I will explain how to call this function from Power Automate.


